As you build your site, it’s likely you’ll want to add products, collections, or clubs to other pages on your website (for instance, your home page, custom collections pages, and custom club pages).
Page Builders #
Each of these shortcodes is available as a drag and drop element in Elementor and Beaver Builder, and in the singular “Commerce7 custom element” in WP Bakery and Pro Theme.
Each of these is also available as a modern Gutenberg block. We highly recommend using Gutenberg for your website (covered on the next docs page).
Shortcodes #
The Commerce7 for WordPress plugin comes with numerous shortcodes to help you integrate your data perfectly, regardless of how your site is built. The following is a list of our shortcodes, their corresponding element settings, and how to use them.
Default Data #
V1 | V2
[c7wp]
The base shortcode. This is required on all pages created by this plugin (as discussed in the previous section).
If you are using a page builder, add a Commerce7 element and select default as the type. No further data is needed.
Restrictions: only one content shortcode per page will be populated by Commerce7.
Collections #
V1 | V2
[c7wp type='collection' data='slug']
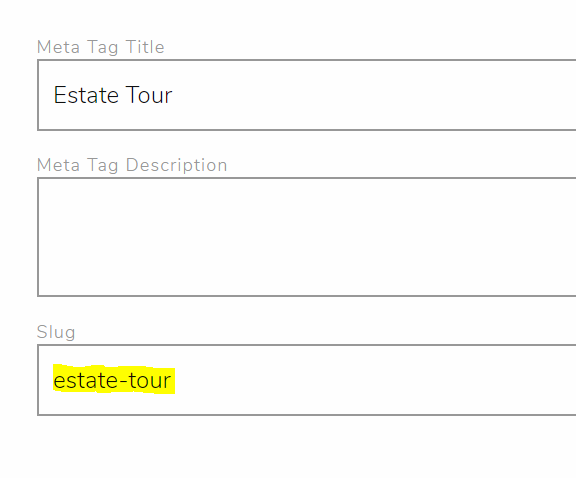
This will place a product grid for the specified collection from Commerce7. Replace the word slug in the shortcode with the actual slug of the collection, found here in your control panel:
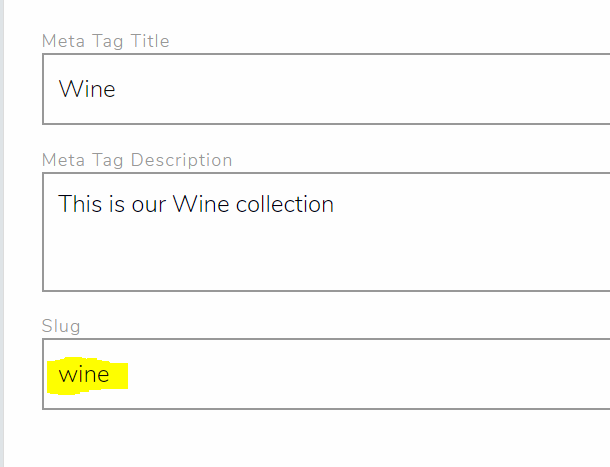
In our page builder elements, set the type to collection, and the data to the name of the slug.
Restrictions: only one content shortcode per page will be populated by Commerce7.
Add To Cart Button – SKU #
V1 | V2
[c7wp type='buy' data='sku']
This allows you to place an Add to Cart button on any page, perfect for making custom landing pages.
Place the correct SKU from Commerce7 into the data attribute.
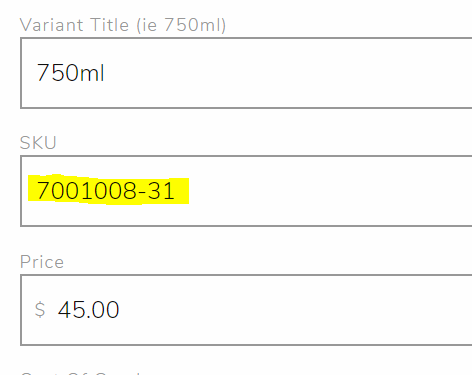
By default, Commerce7 will place the price, a quantity field, and a button. You can customize these with CSS.
Example:
[c7wp type='buy' data='7001008-31']
Restrictions: none
Add To Cart Button – Slug #
V1 | V2
[c7wp type='buyslug' data='sku']
This allows you to place an Add to Cart button, perfect for making custom landing pages.
Place the correct slug from Commerce7 into the data attribute.
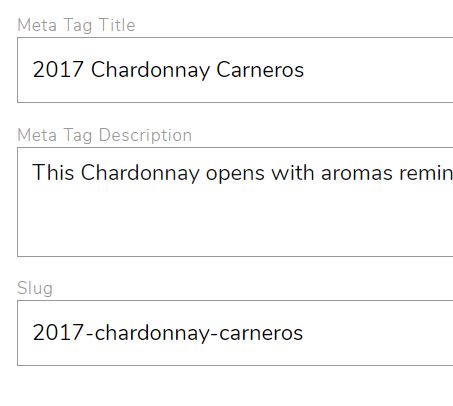
Similar to the button above, except this version will show a drop down with all product variations in it.
Example:
[c7wp type='buyslug' data='2017-chardonnay-carneros']
Restrictions: none
Personalization Blocks #
V1 | V2
[c7wp type='personalization' data='code']
This will place a personalization block from Commerce7. Replace the word code in the shortcode with the actual slug of the personalization block, found here in your control panel:
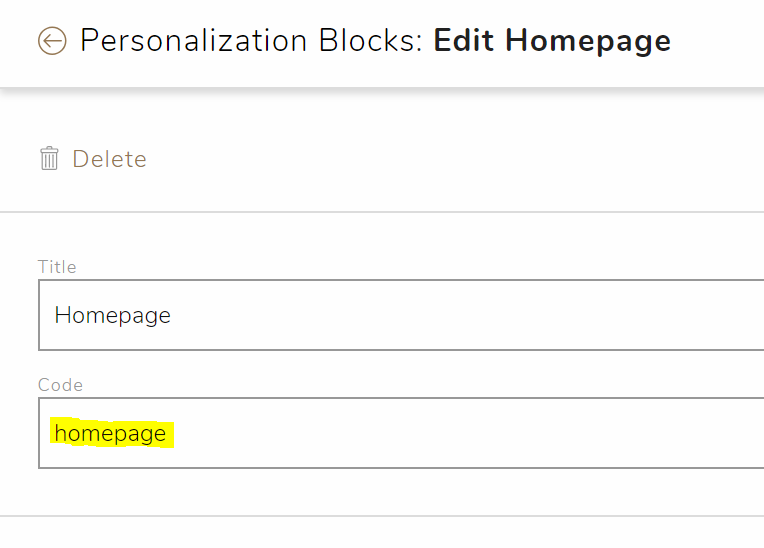
In our page builder elements, set the type to “personalization”, and the data to the code above.
Content for these blocks is created inside your Commerce7 control panel.
Restrictions: not to be used on default C7 pages. This is best used on landing pages and your homepage.
Newsletter Subscribe Form #
V1 | V2
[c7wp type='subscribe' data='true']
This shortcode will add a handy newsletter subscribe form for your Commerce7 email marketing list.
If you are using a page builder, add a Commerce7 element and set the type to “subscribe”.
Set Data to ‘true’ to enable First and Last Name Fields. Set Data to ‘false’ to disable First and Last Name Fields.
Restrictions: only one per page will be populated
Login/Logout Link #
V1 | V2
[c7wp type='login']
This shortcode will add a handy login or logout link to your page. This is best used in your header alongside your primary navigation.
If you are using a page builder, add a Commerce7 element and set the type to “login”.
Restrictions: only one per page will be populated
Cart Total and Flyout #
V1 | V2
[c7wp type='cart']
This shortcode will add the cart total and link to trigger the flyout cart to your page. This is best suited for your header.
If you are using a page builder, add a Commerce7 element and set the type to “cart”.
Restrictions: only one per page will be populated. Do not use if you have the floating cart box enabled in the plugin settings.
Reservation Widget #
V1 | V2
[c7wp type='reservation' data='slug']
This shortcode will add a reservation widget to your page.
If you are using a page builder, add a Commerce7 element and set the type to “Reservation”. Edit the word slug to match the slug of your reservation type in the Commerce7 admin panel.
Magic Club Button #
V1 | V2
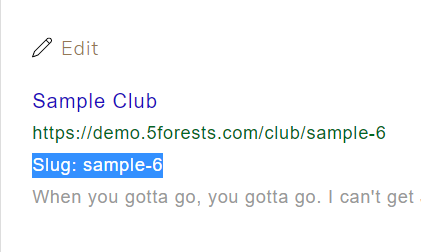
[c7wp type='joinnow' data='slug']
This shortcode will add a magic club button to your page. If your customer is logged in, and a member of the club, the button will change from “join now” to “edit membership”. This is very useful if you have created landing pages for your clubs.
If you are using a page builder, add a Commerce7 element and set the type to “Join/Edit”. Edit the word slug to match the slug of your club in the Commerce7 admin panel.
Contact Forms #
V1 | V2
[c7wp type='form' data='code']
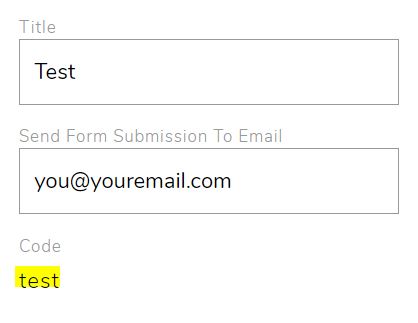
This shortcode will add a Commerce7 created form to your page. These are created on Commerce7, under Marketing/Forms
If you are using a page builder, add a Commerce7 element and set the type to “Form”. Edit the word code to match the slug of your form in the Commerce7 admin panel.
Quick Shop #
V1 | V2
[c7wp type='quickshop' data='slug']
This shortcode will add table of all your collection’s products for quick ordering, generally useful for trade pages.
If you are using a page builder, add a Commerce7 element and set the type to “Quick Shop”. Edit the word slug to match the slug of your collection in the Commerce7 admin panel.

Login Form #
V1 | V2
[c7wp type='loginform' data='/collection/wine']
This shortcode will place a login form anywhere on your site. The data attribute can be used to specify a page to redirect to after login.
If you are using a page builder, add a Commerce7 element and set the type to “Login Form”. Edit the data attribute to specify a URL to redirect to.
Create Account #
V1 | V2
[c7wp type='createaccount' data='/profile']
This shortcode will place an account creation form anywhere on your site. The data attribute can be used to specify a page to redirect to after registration.
If you are using a page builder, add a Commerce7 element and set the type to “Create Account”. Edit the data attribute to specify a URL to redirect to.